I know how important it is to keep old VHS tapes safe and easy to watch. Many people still have memories stored on these tapes, but VHS players are becoming harder to find. Converting those tapes to digital formats makes it possible to watch and share them on modern devices.
The best way to protect your videos is by converting VHS tapes to digital using reliable methods. In this article, I will share the 10 best ways to do this, covering different tools and services that fit various needs.
1) iMemories (Most Convenient Choice)

I find iMemories to be one of the easiest options for converting VHS tapes to digital. They send you a special SafeShip Kit, so you can pack your tapes safely and ship them without worry. This makes the whole process simple and secure.
Once they receive your tapes, iMemories handles the entire conversion. You don’t need to do anything technical or use extra equipment. They convert the tapes into popular digital formats like MP4, which works well on most devices.
I appreciate that iMemories also lets you access your digital files on phones, computers, or even smart TVs. This flexibility makes it easy to watch or share old videos anytime. Their service is known for being reliable and user-friendly, which is why I recommend it for most people.
If you want a hassle-free way to convert old tapes, iMemories is a solid choice. You can learn more about their service and how it works by visiting iMemories conversion service.
2) Elgato Video Capture Device

I chose the Elgato Video Capture device because it offers a straightforward way to convert VHS tapes to digital files. This device connects easily to your VHS player and your computer, making the process simple and direct.
Its software is user-friendly and guides you through each step. I found it supports multiple analog formats like VHS, 8mm, and camcorder tapes. The video quality is good, with a resolution up to 640 x 480, which fits standard playback needs.
The device is compact and portable. This makes it easy to store or move between different setups. I also appreciate its compatibility with both Windows and Mac computers.
While it may not deliver the highest-definition videos, it balances quality and ease well. For anyone wanting a reliable and simple VHS-to-digital conversion, this device is a solid choice. You can learn more about it and how it compares to other options at Elgato Video Capture Review.
3) Roxio Easy VHS to DVD 3 Plus
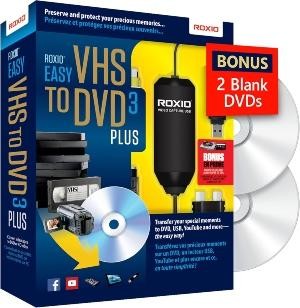
I found Roxio Easy VHS to DVD 3 Plus to be a straightforward option for converting VHS tapes to digital files or DVDs. It comes with both software and a USB capture device, which makes connecting a VHS player or camcorder to my PC easy.
The software lets me edit videos by trimming clips, stabilizing shaky footage, and improving color. It also offers simple tools for adding effects and creating DVD menus if I want to burn discs.
Installation was mostly smooth, though some users report occasional setup problems. The interface is easy to use, making it a good choice for beginners or anyone who wants basic video editing without complexity.
Using Roxio, I could preserve important memories with minimum hassle and some control over video quality. For more details on its features and setup, you can check out the Roxio Easy VHS to DVD 3 Plus review and guide.
4) Wolverine Titan Video Converter
I found the Wolverine Titan Video Converter to be a practical option for turning VHS tapes into digital files. It connects directly to your VCR or camcorder. You then insert an SD card or connect a flash drive to save the recordings. This makes the process simple and quick.
The device does not require a computer during conversion. That saves time and makes it easier for users who are not tech-savvy. With just a push of a button, the recording starts and saves in a common digital format.
The video quality is decent for most personal use. It’s not professional-grade, but it does a good job preserving old VHS tapes clearly. The device supports multiple sources like VHS, camcorders, and DVDs, which adds flexibility.
If you want a straightforward way to save your old videos digitally, the Wolverine Titan offers a solid balance of features and ease of use. More details about this device and how it works can be found in a helpful guide on converting VHS tapes to digital using the Wolverine TransMedia converter.
5) Diamond VC500 USB 2.0 Video Capture
I have found the Diamond VC500 to be a practical choice for converting VHS tapes to digital files. It connects easily to your VCR or camcorder using RCA cables and then plugs into your computer’s USB port. This device works with both Windows and Mac systems.
The software that comes with the Diamond VC500 is straightforward. It allows you to capture video and save it as digital files. It also offers basic editing features to trim or enhance your footage without needing extra programs.
I like that the Diamond VC500 is affordable compared to other capture devices. While it doesn’t deliver professional-grade quality, it preserves memories in a digital format reliably. For those looking to convert analog video at home, it balances ease of use with decent results.
A common issue I noticed is that the software can sometimes have trouble recognizing the video source. However, following the installation instructions carefully can help avoid this problem. You can see more details about this device on the Diamond VC500 product page.
6) ION Video 2 PC Converter
I have found the ION Video 2 PC Converter to be a reliable option for turning VHS tapes into digital files. It connects to your computer through USB, making setup straightforward.
The device comes with EZ Video Converter software. This software is easy to use and helps capture and edit your videos without needing advanced skills.
The video quality is good for most personal projects. The captured files can be saved in common formats, which makes sharing or storing simple.
The package includes everything needed: hardware and software. This all-in-one solution reduces the hassle of finding compatible parts separately.
If you want a tool that balances ease of use with decent quality, the ION Video 2 PC is worth considering. More details about this converter and how to use it are available in the ION Video 2 PC quickstart guide.
7) ClearClick Video to Digital Converter
I chose the ClearClick Video to Digital Converter because it is simple to use. The setup is quick, and you don’t need a computer or special software to start converting. This makes it very convenient for anyone who just wants a straightforward way to digitize VHS tapes.
The device offers decent video quality with a resolution of 720 x 480. It records directly to an SD card or USB flash drive. This feature lets me skip transferring files to a computer before watching or sharing them.
I also like that ClearClick works with various devices like VCRs, camcorders, and even gaming consoles. It handles different formats like AV and RCA. This versatility helps if you have old videos in several formats.
The price is reasonable, costing around $160, which I think balances cost and features well. It is a practical choice if you want to preserve old tapes without too much fuss. You can find more details about this converter on this page about the ClearClick Video to Digital Converter.
8) AVerMedia EZMaker USB
I find the AVerMedia EZMaker USB to be a solid choice for converting VHS tapes to digital. It connects easily to your computer with a USB 2.0 cable, letting you capture analog video from VHS players and other devices. The setup is straightforward, which helped me avoid common connection issues.
This device comes with CyberLink PowerDirector software. It allowed me to edit and improve my videos, fixing issues like shaky footage and poor lighting. The software is user-friendly enough for beginners but powerful enough for basic editing.
Using AVerMedia EZMaker USB, I could save my VHS tapes in popular digital formats on my PC. The captured videos are stable and clear, with no signal loss during transfer. For anyone wanting to preserve old tapes at home, this is a reliable and affordable tool to consider. You can find more details through this link to AVerMedia EZMaker 7 product information.
9) DIY Method Using a VHS Player and USB Capture Card
I use a VHS player connected to a USB capture card to convert tapes at home. This method is affordable and lets me control the entire process.
First, I connect the VHS player’s RCA cables to the USB capture card. Then, I plug the capture card into my computer. This setup works with both Mac and PC.
Next, I open the video capture software that comes with the USB card. Before playing the tape, I make sure the software is set to record from the capture device.
When I start the tape in the VHS player, the software records the video as a digital file. The output resolution is usually around 640 x 480, which is similar to the original VHS quality.
This DIY way is simple, needs basic gear, and saves money compared to professional services. It’s a good choice if I want to preserve my old tapes without special skills or expensive tools.
For detailed steps and tips, I found a useful guide on how to digitize VHS tapes using USB capture cards at Tom’s Guide.
10) Professional VHS Digitization Services
I find professional VHS digitization services to be a reliable way to convert tapes to digital formats. These companies handle the entire process, which saves me time and effort.
They use high-quality equipment to preserve the best possible image and sound from my tapes. This reduces the risk of losing important footage due to tape degradation.
Many services offer different output options, like DVDs, USB drives, or cloud storage. This flexibility helps me choose the format that fits my needs.
I also like that these services often include extras like cleaning and repairing tapes before digitizing them. This careful handling improves the quality of the final product.
If you want a simple and effective way to save your memories, hiring a professional service is worth considering. You can find top options and reviews in articles about the best VHS to digital service.
Preparing Your VHS Tapes for Digital Conversion
Before starting the conversion, there are a few important steps to take to make sure your VHS tapes are ready. These steps help protect your tapes and make the process smoother.
Checking Tape Quality
I always begin by checking the condition of each VHS tape. Look for cracks, warping, or mold on the tape surface, which can cause playback problems or damage your player. If the tape looks brittle or has visible signs of damage, it might not convert well.
Play a small portion of the tape on a VHS player to check if it still works. If the image is overly fuzzy, shaky, or distorted, that tape could be deteriorating. Taking notes on which tapes are in poor condition helps me decide if I need to handle them more carefully or get professional help.
Cleaning and Rewinding Tapes
Dirt, dust, and debris can affect the quality of your digital file, so I clean the tapes gently. Use a soft, dry cloth to wipe the outside of the tape cartridge. Avoid using liquids on or inside the tapes.
I make sure each tape is fully rewound to the start before converting. This prevents skipping and helps the capture device correctly read the tape from beginning to end. If a tape is stuck or won’t rewind, that tape may need repair or professional attention.
Labeling and Organizing Footage
I find it very useful to label each tape clearly before conversion. Write a tape number, date, or a short description of the contents on a sticker or directly on the tape case.
I also keep a list or spreadsheet with details like tape title, length, and any important notes. This makes it easier to track your digital files after conversion and to find specific clips later.
Being organized saves time and frustration during and after the process.
Understanding Digital Formats and Storage Options
I know that choosing the right digital format and storage method is key to keeping your videos safe and easy to access. You want files that work well on different devices and storage systems that protect your videos from damage or loss.
Choosing the Right File Format
When converting VHS to digital, picking a good file format matters.
Common choices are MP4, AVI, and MOV. MP4 is popular because it balances good video quality with smaller file sizes. It plays easily on phones, computers, and TVs.
AVI and MOV often keep better quality but create larger files. These may need more storage space and may not play on every device without extra software.
I recommend MP4 if you want a simple, reliable format. If you want the highest quality for editing later, consider AVI or MOV.
Look for video settings like resolution (usually 480p for VHS) and bitrate. Higher bitrate keeps more detail but uses more space.
Long-Term Storage Solutions
After converting, you need a good way to keep your digital files safe for years.
I use multiple storage methods:
- External hard drives: Fast and offer lots of space. Ideal for backups but should be stored carefully to avoid damage.
- Cloud storage services: Services like Google Drive or Dropbox let you access files anywhere and protect them from physical damage.
- USB flash drives: Portable but less reliable long-term compared to hard drives.
- DVDs or Blu-ray discs: Physical backups, but these can degrade or get scratched over time.
You should keep at least two copies in different places. Regularly check files to make sure they aren’t corrupted. This helps avoid losing precious memories because of storage failure.
For more details on formats and storage, you can visit complete guide.
Frequently Asked Questions
Converting VHS tapes to digital requires choosing the right tools and methods. You need a device or service that fits your budget and technical skills. Software options also play an important role if you want to do it yourself on a computer.
What is the best method for transferring VHS tapes to a digital format at home?
Using a video capture device connected to your VCR and computer gives you good control. Devices like the Elgato Video Capture or Diamond VC500 are reliable for home use. This method allows you to save files directly in a digital format.
Which VHS to digital converter device receives the highest ratings?
The Elgato Video Capture Device and the Roxio Easy VHS to DVD 3 Plus are among the highest-rated. I have seen many positive reviews for these because they are easy to set up and offer clear video quality. Wolverine Titan and Diamond VC500 are also popular in the community.
How can I convert old VHS tapes to digital without using a VCR?
It is possible to convert tapes without a VCR by using standalone converters like the Wolverine Titan. These devices have built-in players and save the footage directly to a USB drive or memory card. This can be simpler if your VCR is not working.
Where can I find services that convert VHS tapes to digital formats?
Professional services like iMemories offer mail-in options for digitizing your tapes. These services handle the entire process and return digital files or DVDs. Local electronics stores or specialty shops might also provide in-person conversion help.
What are the top software options for converting VHS to digital on Windows 10?
Programs like VirtualDub and Avisynth work well for capturing and editing video. Many capture devices also come with their own software for recording VHS footage. Windows 10 supports most USB capture devices without issues.
Are there any cost-effective ways to digitize a VHS collection?
Using inexpensive capture devices like the Diamond VC500 combined with free software like VirtualDub can save money. Another option is to find a used VCR and buy a budget capture card. This DIY route is more affordable than professional services.
For more detailed steps and reviews of these devices, you can check out this complete guide to transferring VHS to digital.